Showing posts with label dye. Show all posts

Thursday, 26 July 2018

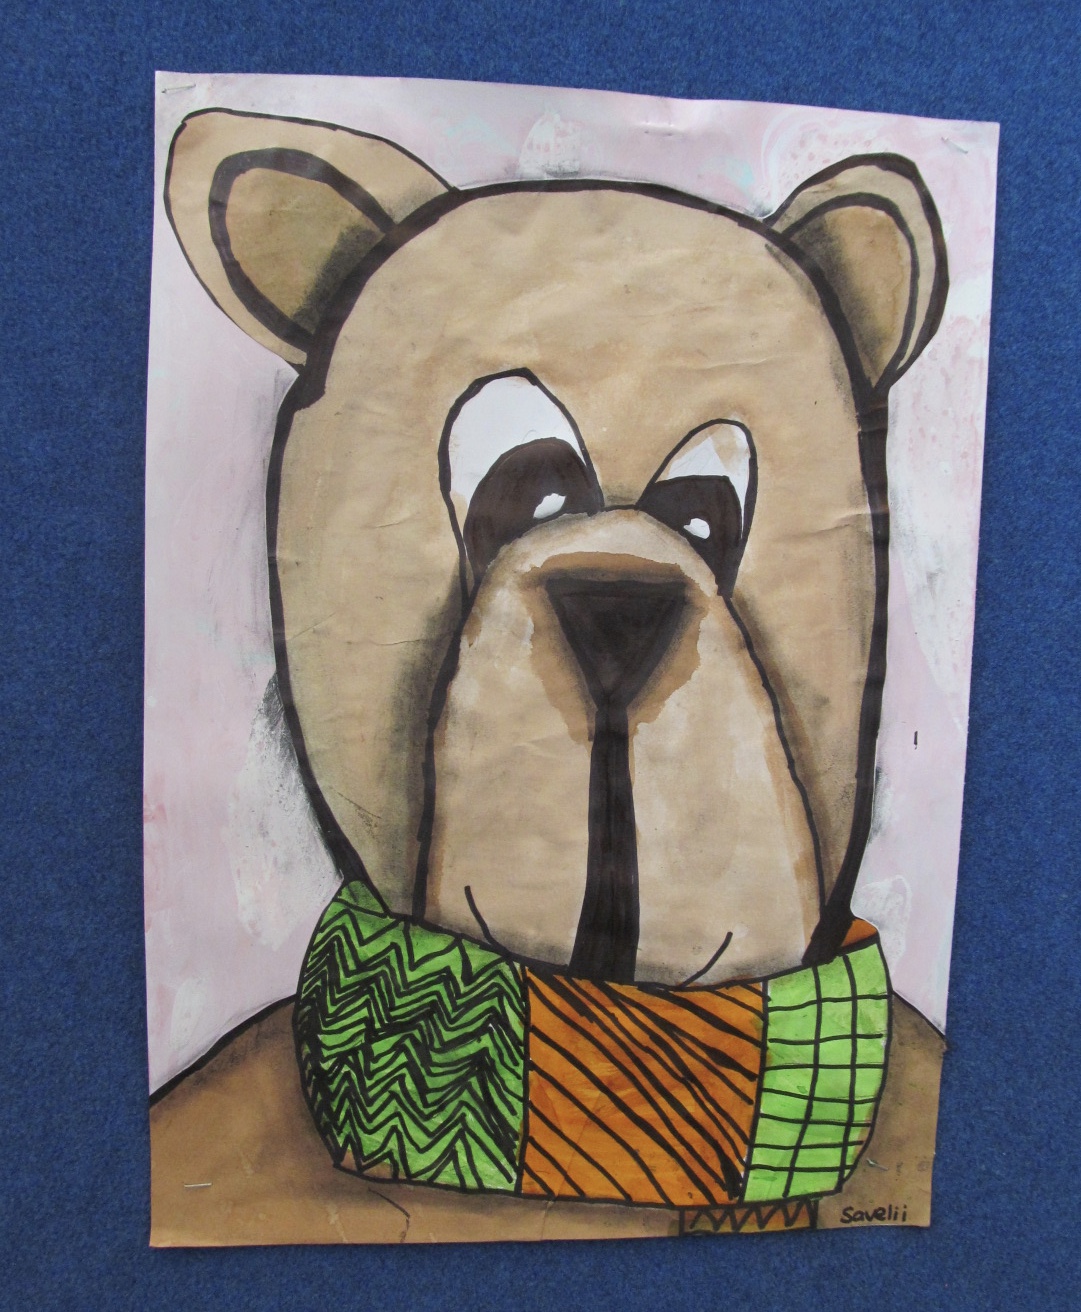
My Brown Bear Barney


 Year 2 students sketched Teddy bears and looked at the position of the eyes and how it changes the look of the bear.
They enlarged their bears and used ink pen to outline and then brown dye inside.  Each bear has a scarf with different patterns which are also dyed.

Thursday, 13 April 2017

Taniwha


Year 4's looked at shapes and patterns consistent with a wooden Taniwha.  They divided their page into 4 parts, the first section needed to be filled with the brows, the second was the eyes and nose, the third was the mouth and the final section had the arms.  We added patterning to the art work and applied brown dye to the face. Other colours were selected for the patterns and mouth.  Black vivd pen was used to highlight lines and thicker lines emphasised the nose, mouth and eyes.

Thursday, 18 August 2016

Shells


Year 5 students sketched many different shells and used black vivid to outline first.  They used cotton buds and dye to colour the shell.  White crayon was used to show the light source.  

Thursday, 5 May 2016

Spring flowers


Year 3 students looked at and sketched flower shapes.  They had to sketch flowers closed, facing different directions and various sizes.  The pencil outlines were covered with black vivid and the background was dyed blue using a paint brush.  Cotton buds were used for the inside of the flowers, around the stems and leaves.  The cotton buds are dipped into the dye and used like a pencil- this gives the children greater control.

Friday, 12 July 2013

Jandal bags


These lovely bags were made by Year 1 students.  They sketched the jandal shape first (there were no templates used!) and then  different patterns were added on top of their jandal.
The pattern was inked over and cotton buds used to apply colourful dye.  These were then cut out and glued to a coloured background of their choice.  Charcoal was added around one side of the shoe and blended in.  Children used stickers to make a pattern around their frame.  Finally the artwork was placed onto a paper bag and displayed.

Friday, 12 April 2013

Warm sun and cool moon


 Year 3 children simply made their sun and moon using bright coloured dyes and black vivid.  They used different patterns to represent each one.  Dye was applied to the pencil work first using a cotton bud.  Once dry the pencil was outline in waterproof black pen.


Friday, 1 March 2013


 Landscapes:
Year 1 students worked hard observing and practicing patterns.  We began by using a piece of thin wire to bend into different lines - sharp lines, soft lines, spirals.  They carried this onto their white boards and we all repeated patterns our friends had come up with.
From here we looked at different artworks that included landscapes.  We decided where our landscape would sit on the page and where we would place the trees and house.
I again used cotton buds for the dye work and black pens.  We added white paper for our windows, clouds and doors.  A white paint pen was used on some of our patterns.
I love how different they all are!

Warm and Cool insects

Warm and Cool Insects:
These lovely insects were made by the Year 3 students.  They sketched a selection of insects and decided on the one they liked.  
We began by drawing the large insect onto the paper. Once completed they had to add a large circle behind it.  Petals were added and needed to be extended off the page.
They then had to decide whether the flower or the insect was to be warm or cool colours.  Once they had made that decision they began adding pastel to the outlines and dots to the middle of the flower.
                                                      Very watery dye was added to the flower and colours were
allowed to run into one another.
 Finally we completed the insect merging the colours together.  The insect was outlined in black.


Friday, 15 February 2013

Leaves:
 I am a great believer that children are very capable of making their own stencils, even 5 year olds.  These Year 2 children drew their leaves onto card first, and once cut out were able to use them to place their leaves evenly around the page.  They were encouraged to also show part of the leaf near the edges.
We had done a lot of pattern work and they divided up the leaf into sections.  The background was then dyed, taking extra care not to go near the leaf shape.  Once dry they inked the shapes and patterns choosing certain patterns to stand out.


Fish:


                                                                                  Y1 students dyed the background and used cotton buds and darker dyes to add swirls.   The fish were sketched in pencil onto the dry background.  We used a white paint pen to cover the pencil lines.  


Warm and Cool Autumn leaves:


These Autumn leaves have segments added to the inside of them using warm dye colours and black vivid.  They are then cut out separately and backed onto black paper.  Meanwhile the background begins with a circle in the middle and lines drawn toward the edge of the paper.  Cool pastel colours are used and black pastel to highlight the lines.

Wednesday, 13 February 2013

Autumn Leaves:


These Autumn leaves were sketched first and then transferred onto larger pieces of paper.  They were then dyed with warm colours and outlined in black.  Once they were cut out, I laminated them, placing the leaves in the middle and a coloured paper frame.


Tuesday, 12 February 2013

Me and my shadow:
I start the year with portraits and observing the parts of our body, as some Y1 students believe their arms extend from their head.
For this project we looked at ourselves and drew together each part.  We went outside on a sunny day to watch our shadows.  The portraits are completed with coloured dyes and outlined with vivid.  The shadow has been copied from the original and cut out from black paper.


Saturday, 2 February 2013

Vase of flowers

Year 1 students sketched different flower shapes. They drew these onto cartridge paper and used black vivid pen and colourful dyes to complete their flowers.  Next we looked at the basic shape of a vase and drew this onto coloured paper.
The students decided what type of blinds they would have in their window. They used wallpaper and strips of paper for the window frame.  This was then all placed on the page and glued into position.