Showing posts with label 3D. Show all posts

Thursday, 26 July 2018

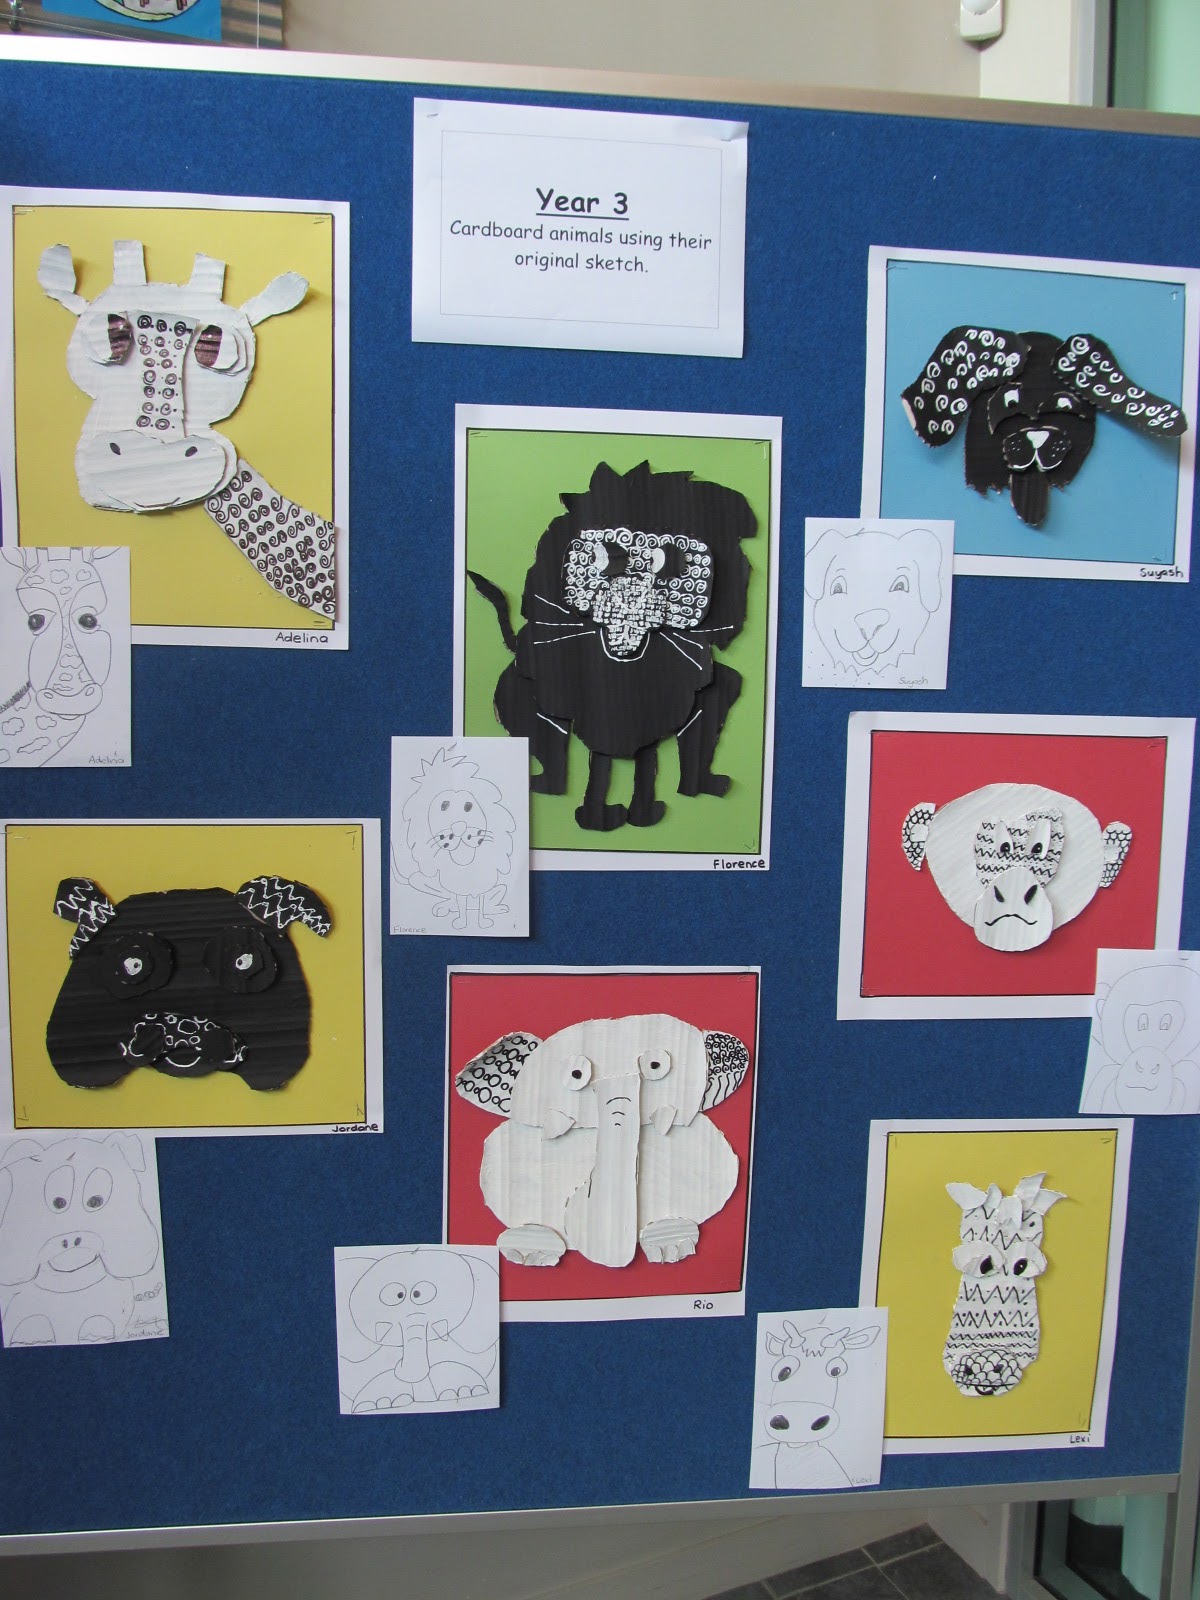
Animals

 Year 3 students sketched different animals and transferred each part of the animals onto corrugated cardboard.  They cut out each piece and painted them either black or white.  Patterning was used on 2 or 3 parts of the animal. 
The patterns were either detailed in black vivid or white correction pens.
The whole animal was repositioned onto card and glued into place.
Next to each finished piece is their original sketch.


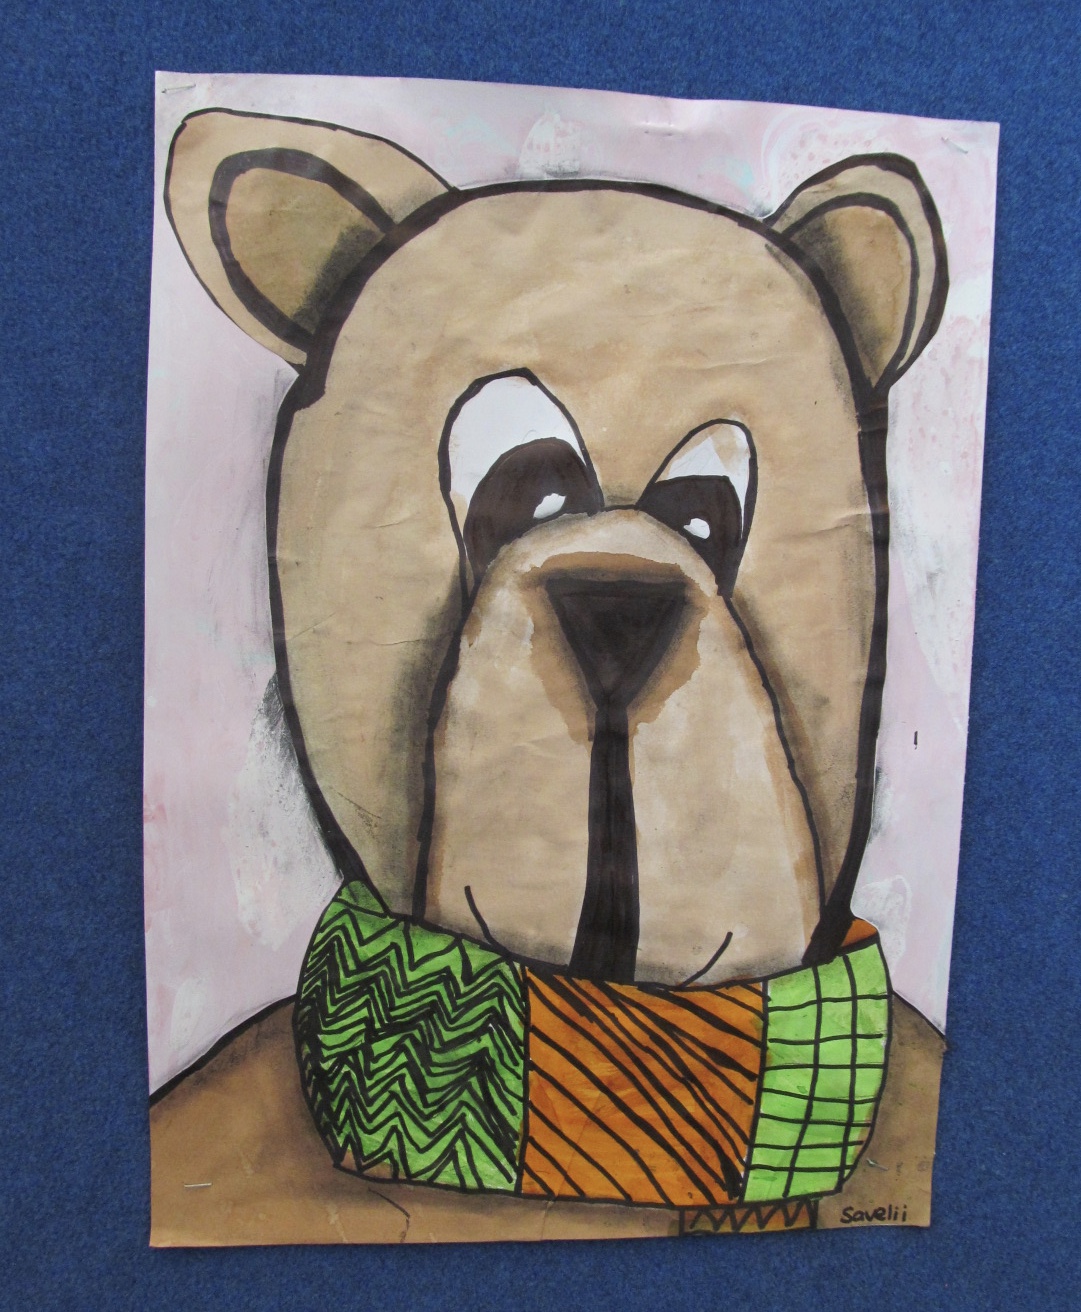
My Brown Bear Barney


 Year 2 students sketched Teddy bears and looked at the position of the eyes and how it changes the look of the bear.
They enlarged their bears and used ink pen to outline and then brown dye inside.  Each bear has a scarf with different patterns which are also dyed.

Thursday, 18 August 2016

Shells


Year 5 students sketched many different shells and used black vivid to outline first.  They used cotton buds and dye to colour the shell.  White crayon was used to show the light source.  

Robots


Year 2 students used a variety of materials such as cardboard, milk bottle tops and foam shapes to make their robot.  The finished robot was sprayed in silver paint.

Friday, 20 March 2015

Marbles


Year 5 students looked at marbles and saw different patterns within them.  They designed their own group of marbles making sure they were different sizes.  Circles were made onto cartridge paper and they used watercolour paints to give the glassy look.  They added white onto one side of the marble to show the light source.  Once all the marbles were painted we used black paper and drew lines to make it look like the corner of a room.  One side of the wall was coloured in with white pastel.  The students then attached their marbles overlapping some of them.  They used charcoal to add a shadow onto the back marble.


Thursday, 21 August 2014

Digital art


Year 6 children discussed ideas of objects they could hold in their hands.  Once they had decided, they had another child take the photo of just their hand.   This was printed out in colour and the students used pencil to draw their idea onto the printout.
Once happy with the sketch they highlighted the pencil in black vivid.

Wednesday, 26 March 2014

Vase of flowers


These lovely vases of flowers were constructed by Year 1 students who have only been at school for a few months.  They began by cutting strips of green paper for the stems and gluing them onto the black paper.  Leaves were also added to these.  The vases were decorated with coloured paper and stapled onto the black paper to make a cylinder shape.
I demonstrated several different ways to make 3D flowers and the children selected two colours for each flower.  They drew, cut and glued these on themselves.  

Friday, 16 August 2013

Cardboard shoes


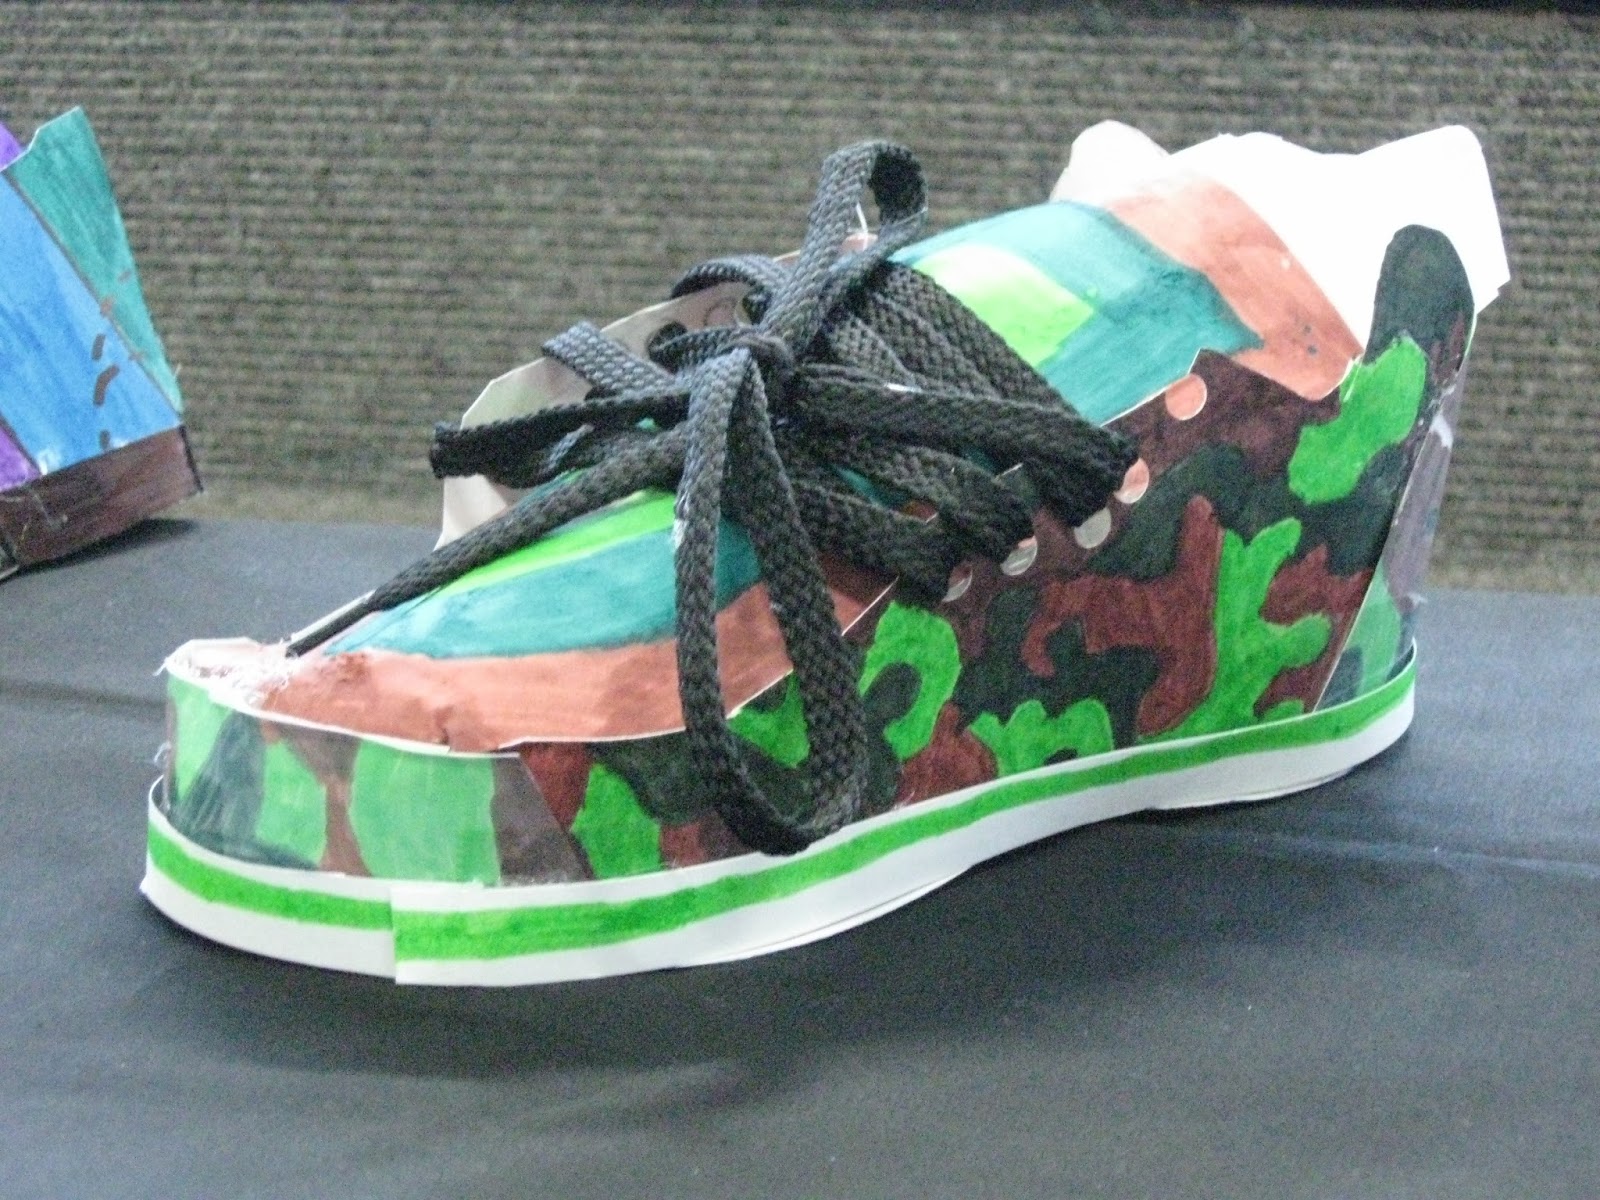
Year 6 students made their own shoes using cardboard.  There was a lot of problem solving that the children needed to work through in order to complete the finished product.  We began by looking at a paper template for a sports shoe, which the children completed.  Once they had an idea of the pieces needed, they cut out and measured parts for their shoe.  (They had no templates for their final shoe).  They designed the logo and colours straight onto the cardboard.  Once this was done the children used a glue gun to attach each part to the sole.  A hole punch was used for the holes where the shoelaces were then threaded.

Friday, 22 March 2013

Butterflies


Butterflies
Year 3 students sketched and designed the patterns they wanted inside their butterfly.
We began with a cardboard cylinder for the body and thin wire for the wings.  The wire needed to be pushed through the cardboard  and taped onto the inside.
The children papier mache the body and wings with layers of newspaper and newsprint. The last layer was newsprint.  The papier mache had to be wrapped around the edges of the wings and connected the body to the wings.
Once these were dry the children began to paint them.  They took a couple of coats for the first colour.   Finally they used PVA black glue to add detail and to make their design stand out.  They were varnished and made a great display on the wall.

Saturday, 2 February 2013

Vase of flowers

Year 1 students sketched different flower shapes. They drew these onto cartridge paper and used black vivid pen and colourful dyes to complete their flowers.  Next we looked at the basic shape of a vase and drew this onto coloured paper.
The students decided what type of blinds they would have in their window. They used wallpaper and strips of paper for the window frame.  This was then all placed on the page and glued into position.


3 Dimensional Shapes:

Year 6 students looked at 3 D shapes.  A lamp was used to show the students the shadows produced by the light and shape.  They practiced these shapes and shading techniques to complete 4 different forms.
They then decided how they would be positioned on the paper and a digital photo of themselves was taken and added to the finished piece.


Houses
Year 6 students used the Property Press of houses for sale to find one that they would like to sketch.  We practiced drawing lines at different angles to make our houses look 3 dimensional.  The students transferred this onto heavy weight cartridge paper and were asked to add their own landscaping.
Before view of a house
After instruction


Once the pencil work was done, we used water colour paints to complete these wonderful houses.


Woven People:
Year 2 students used a cardboard loom to make clothes for their collage person.  


The most difficult part of this project was the collage.  They had to measure the size of the head and limbs so that the person looked in proportion with the outfit.
Belts were added for interest. 

Friday, 1 February 2013

Teddy Bears:
Year 2 children were asked to draw what they thought a Teddy Bear looked like.

Before sketch
We then looked carefully at an actual Bear and talked about the shapes and lines we could see.  We also focussed on where the light source was coming from and how that cast shadows.
After sketch
Next we enlarged our bears onto A3 paper and began painting.  Once dry they were outlined with black vivid and cut out.  The bears were glued onto a larger white piece of paper and the children were shown how to use lines to give the impression of a wall.
Completed Artwork